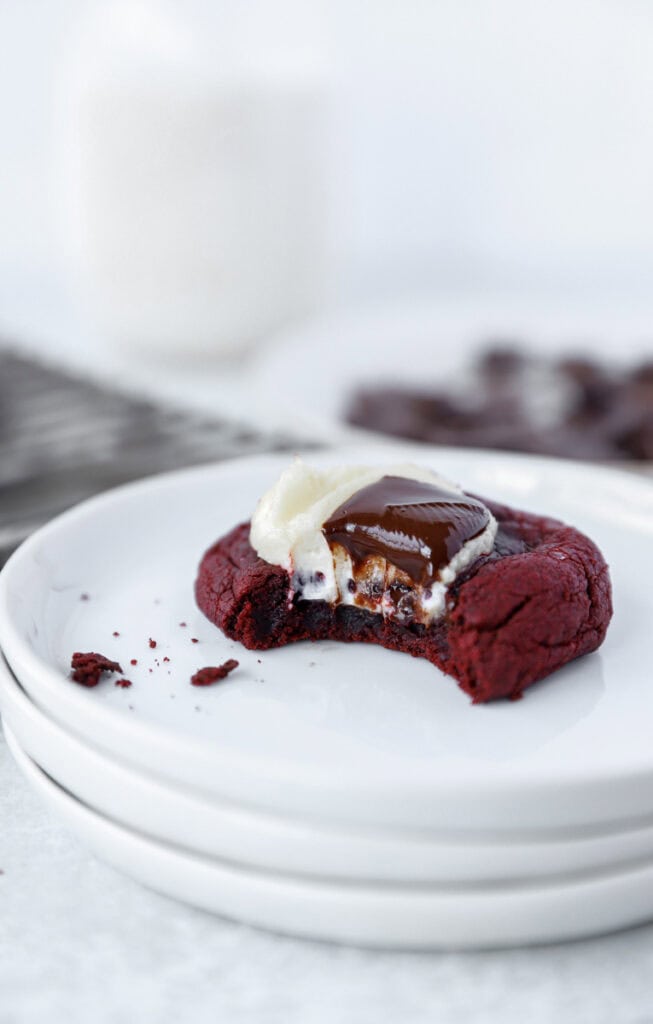
There’s something extra special about red velvet cake. The name, the look, the taste. I wanted to reimagine the decadence of red velvet cake as a soft and chewy cookie. These red velvet cookies are soft baked, beautifully red, and loaded with the irresistible combination of rich dark chocolate and sweetened cream cheese.

INGREDIENTS
Here’s what you’ll need to get these cookies baking this week!
- All purpose flour.
- Cocoa powder.
- Salted butter.
- Baking soda.
- Sugars: dark brown sugar and white sugar.
- One egg.
- Liquid red food coloring. I used liquid, not gel for these cookies.
- Salt.
- Vanilla extract.
- Chopped dark chocolate. You’ll use some mixed into the cookie, and some as a garnish for that beautiful pool of melted chocolate on the top.
- Cream cheese.
- Powdered sugar.
HOW TO MAKE THE CREAM CHEESE TOPPING
Of course the showstopper of red velvet cake is that vibrant beautiful red, but the cream cheese icing really completes the bite and for me establishes something as a true “red velvet” dessert. When I was imagining my recipe for a red velvet cookie, I knew it couldn’t just be a red cookie, there has to be a sweet cream cheese element to them.
When you make these cookies you’ll need to start with the cream cheese topping. The prevent the cream cheese from spreading too much it needs to be frozen before baking.
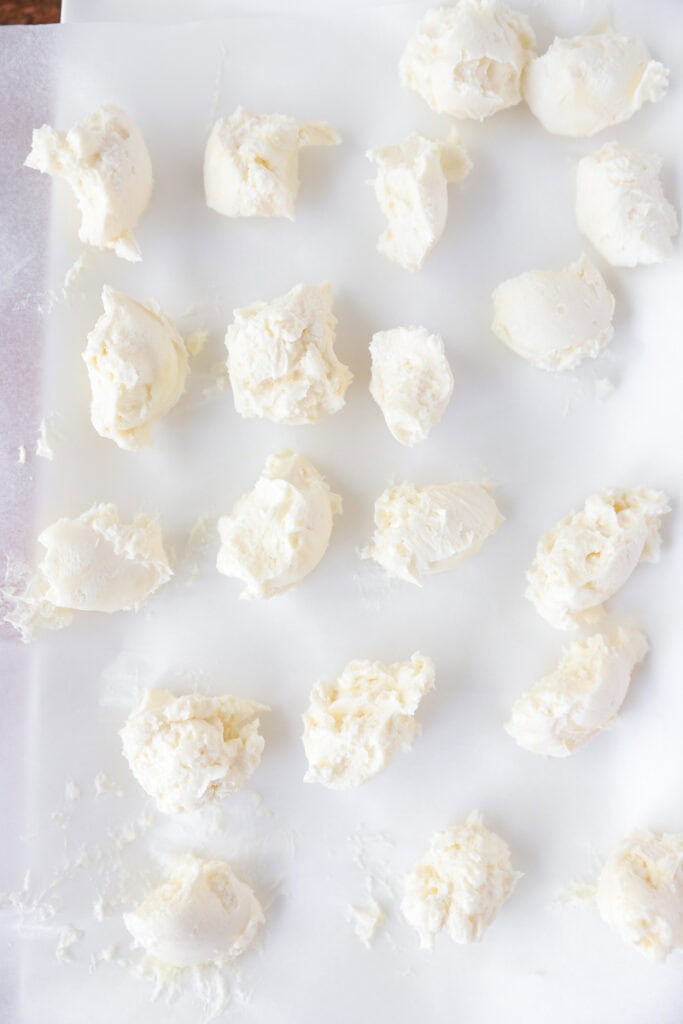
First. Make sure the cream cheese is softened before making the mixture. If it’s too cold it won’t easily blend you’re going to end up a clumpy mixture. So once the cream cheese is soft, mix in the powdered sugar and the vanilla.
Second. Make portions about the size of a teaspoon and place on parchment paper.
Third. Freeze for 30 minutes. While it’s freezing, you’ll be making the cookie dough and preheating the oven.
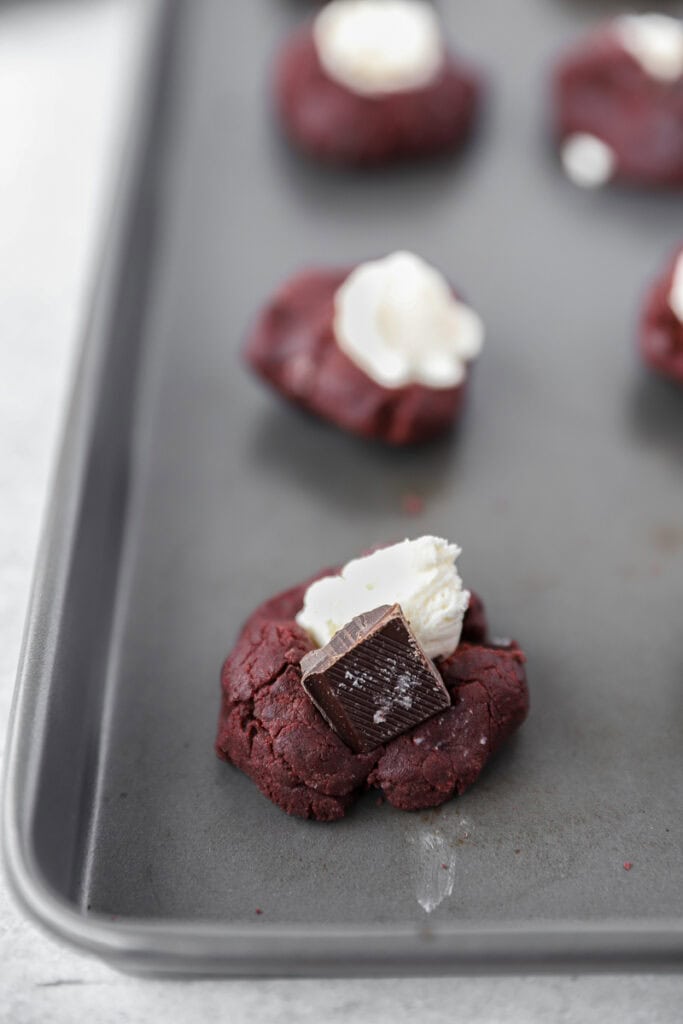
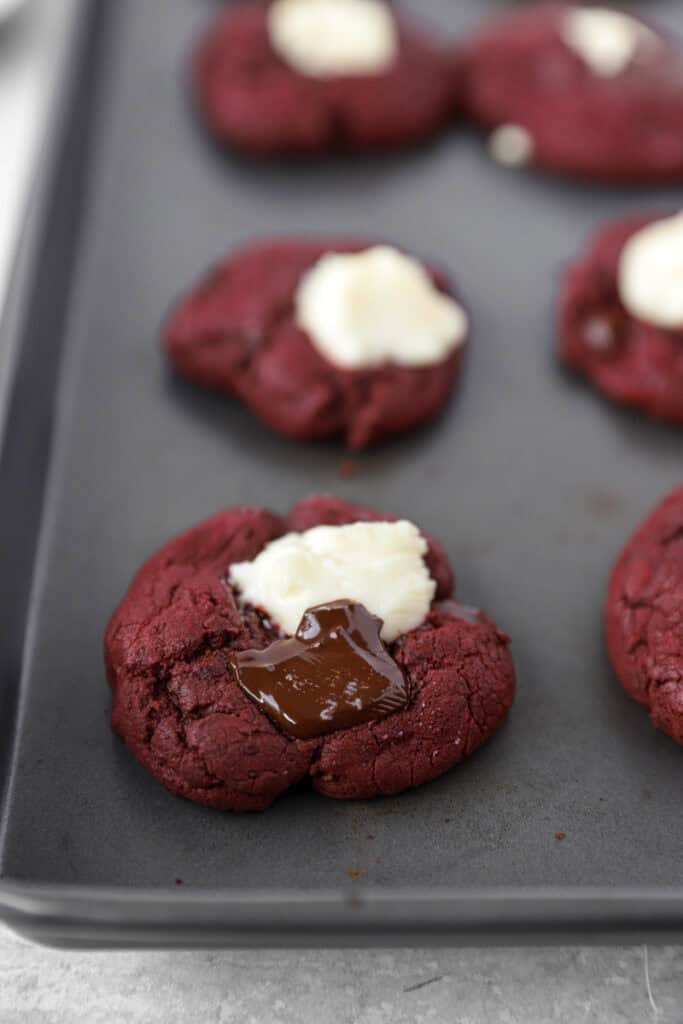
Once you’ve got the frozen cream cheese and the mixed cookie dough you’re ready to bake! Add a section of cookie dough, top with a piece of frozen cream cheese, then a small piece of chopped dark chocolate. Bake for 10 minutes.
COOKIE STORAGE
These can stay on the counter at room temperature for 2 days, but then after that it’s best to store them in the fridge to preserve them longer.
But don’t worry about the chilling, you can still get that soft ‘fresh from the oven’ experience. Just microwave the cookie for 8-10 seconds and you’ve got yourself a warm cookie that tastes as good as the day you baked them.
While these cookies would be perfect any time of the year, how perfect would these be for a Valentine’s Day treat?!
For more cream cheese centered desserts, try some of these favorite recipes!
Cheesecake Cookies
No Bake Chocolate Cheesecake
No Bake Coconut Cheesecake
And if you’re in the mood for more cookies, browse my cookie section for some inspiration.
PrintRed Velvet Cookies
Everything you love about red velvet cake in a soft and chewy cookie! Vibrant red cookie dough topped with sweet cream cheese and dark chocolate then baked til perfection.
- Prep Time: 30 minutes
- Cook Time: 10 minutes
- Total Time: 40 minutes
- Yield: 17 – 18 cookies
- Category: Cookies
- Method: Baking
- Cuisine: American
Ingredients
1 and 1/2 cups all purpose flour
1/3 cup cocoa powder
1 teaspoon baking soda
1 stick salted butter, melted
3/4 cup dark brown sugar, lightly packed
1/4 cup white sugar
1 egg
1 teaspoon vanilla extract
3 teaspoons liquid red food coloring
3/4 teaspoons salt
2 bars dark chocolate, chopped (look for 72% dark cocoa 3.5oz bars like Ghirardelli or Lindt) you will use 1 bar in the cookies, and some of the second bar for garnishing
Cream Cheese Topping
4 ounces cream cheese, softened
2 and 1/2 tablespoons powdered sugar
1/8 teaspoon vanilla extract
Instructions
1. Start by making the cream cheese topping. It’s very important the cream cheese is softened so you get a smooth blend. Add the cream cheese to a bowl then mix with the powdered sugar and vanilla. Section off into teaspoons sized portions and place on a platter lined with parchment paper. Place in the freezer for 30 minutes.
2. While the cream cheese is freezing, start making the cookie dough. In a large bowl combine the dry ingredients. Add the all purpose flour, then sift in the cocoa to avoid clumps. Mix in the salt, and baking soda.
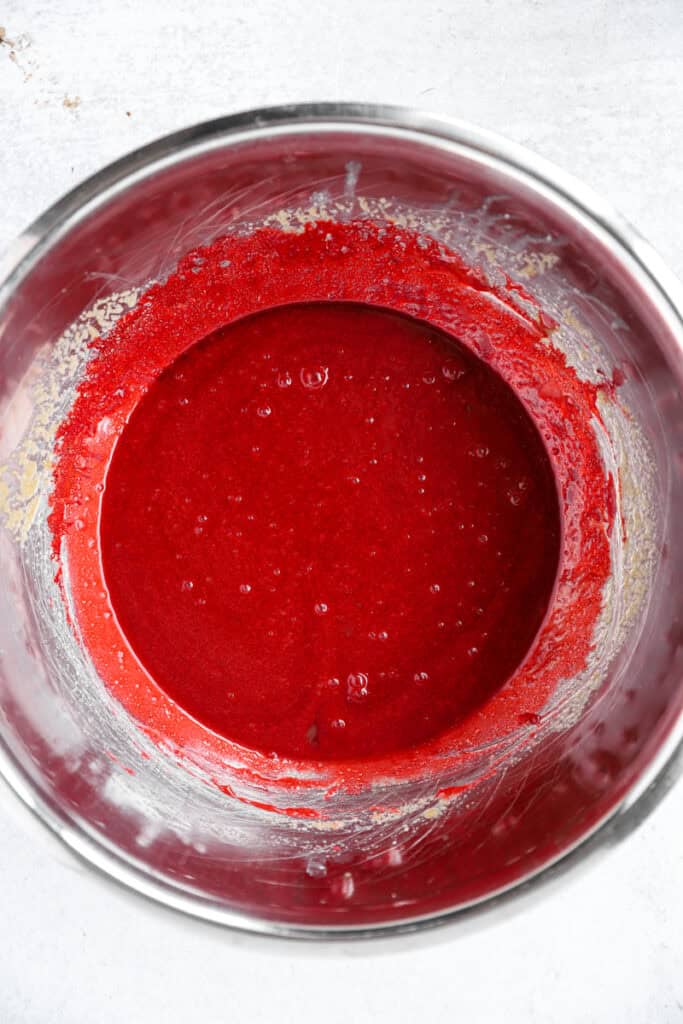
3. Melt the butter then add to a large bowl. Whisk in the white sugar, then then the brown sugar, the egg, vanilla extract, and the liquid red food coloring.
4. When there’s about 10 minutes left for the cream cheese freezing, preheat the oven to 350 degrees.
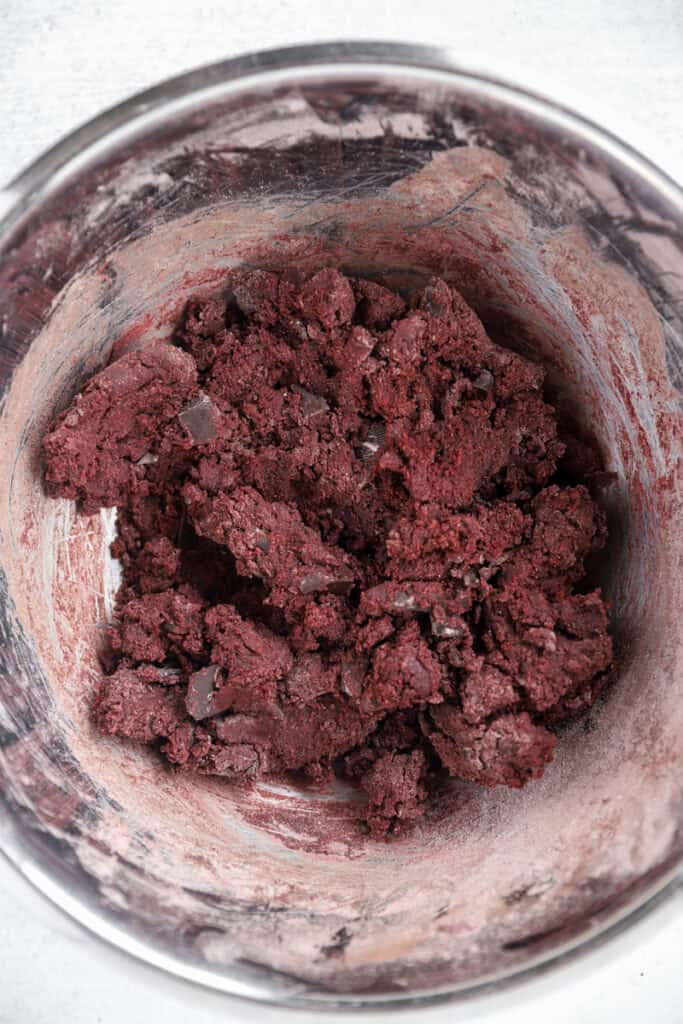
5. Add about 1/2 the dry ingredients into the wet and stir to combine. Then add into most of the first bar of the chopped dark chocolate (the bar I used in this photo was a 3 ounce bar, so if you’ve chopped a 3.5 ounce bar add most of it and reserve the rest for garnishing). Then, add the remaining dry ingredients, stirring and kind of “mashing” until all of the dry mixed into the wet.
6. Form a cookie dough ball and gently press onto the cookie sheet. Press on top a piece of the cream cheese filling, then a small square of the chopped dark chocolate. Repeat until all the cookie dough is used…you might not use all the cream cheese filling and not all of the dark chocolate.
7. Bake for 1o minutes, then remove to a plate.