A sugar cookie perfect for Fall and the Holiday season! These pumpkin sugar cookies are a spiced pumpkin cookie dough that you can roll and cut shapes from with all of your fun cookie cutter shapes. Top with frosting and a dash of nutmeg for the perfect bite.
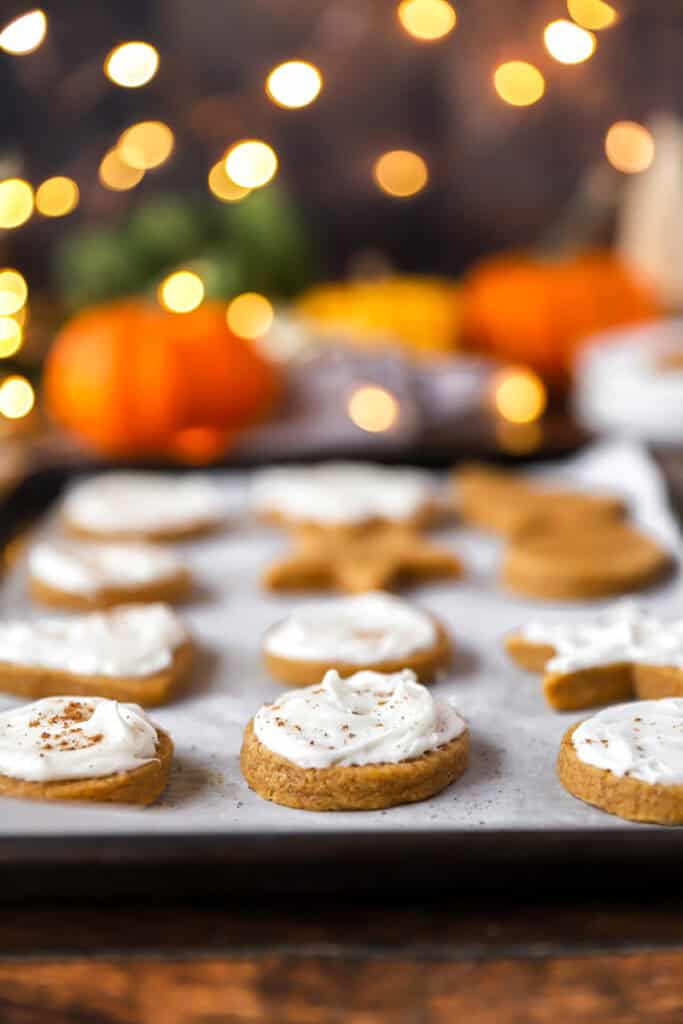
We’re all familiar with the decorated sugar cookie. Their a classic at Christmas! Rolling the dough, cutting all the fun shapes, then decorating with sprinkles or frosting. I decided to try and create a pumpkin sugar cookie dough that you can roll to cut shapes, and the shapes will hold their form!
This wasn’t exactly easy, and took about 5 tests before it was perfected. (I ate A LOT of pumpkin cookie dough over the last few months). But finally, I’m able to share with you the most epic sugar cookie for Fall and Christmas!
HOW TO GET PERFECT PUMPKIN SUGAR COOKIES
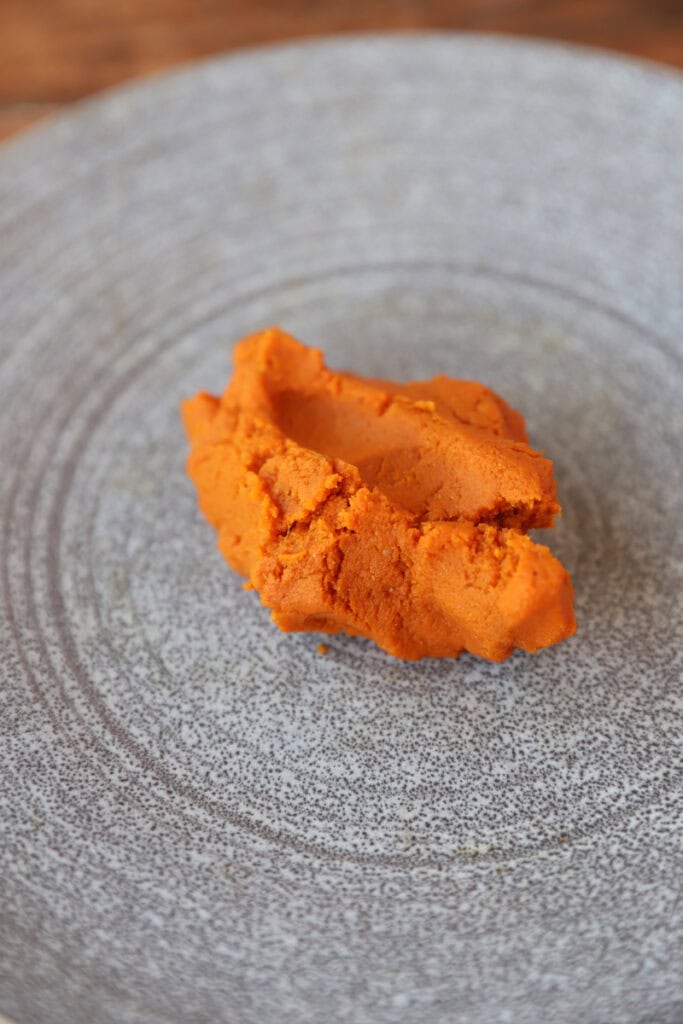
We’re going to get right to the most important part of making sure these cookies come out perfectly for you! You have to remove the moisture from your canned pumpkin.
I’m telling you right now, if you don’t these are not going to work at all, and is the most common mistake in pumpkin sugar cookies. There is so much water in pumpkin, and if it’s not removed not only will the dough not be rollable but they’ll be puffy and cakey.
There are two ways you can strain the pumpkin puree. First, you can use a cheesecloth. Add the pumpkin to the cloth and continuously squeeze until the bulk of the liquid has been removed. Then use paper towels to make sure it’s dry. There will still be some moisture coming off the pumpkin, but it should be minimal.
The second option is to blot it with paper towels. You’ll go through several paper towels but you want to continuously blot until very little moisture is being pressed from the pumpkin (there will still be some moisture but it should be minimal.) I only recommend this method if you’re using Libby’s brand pumpkin. I tried this method with store brand pumpkin and it didn’t work, pieces of the paper towel kept getting stuck to the pumpkin.
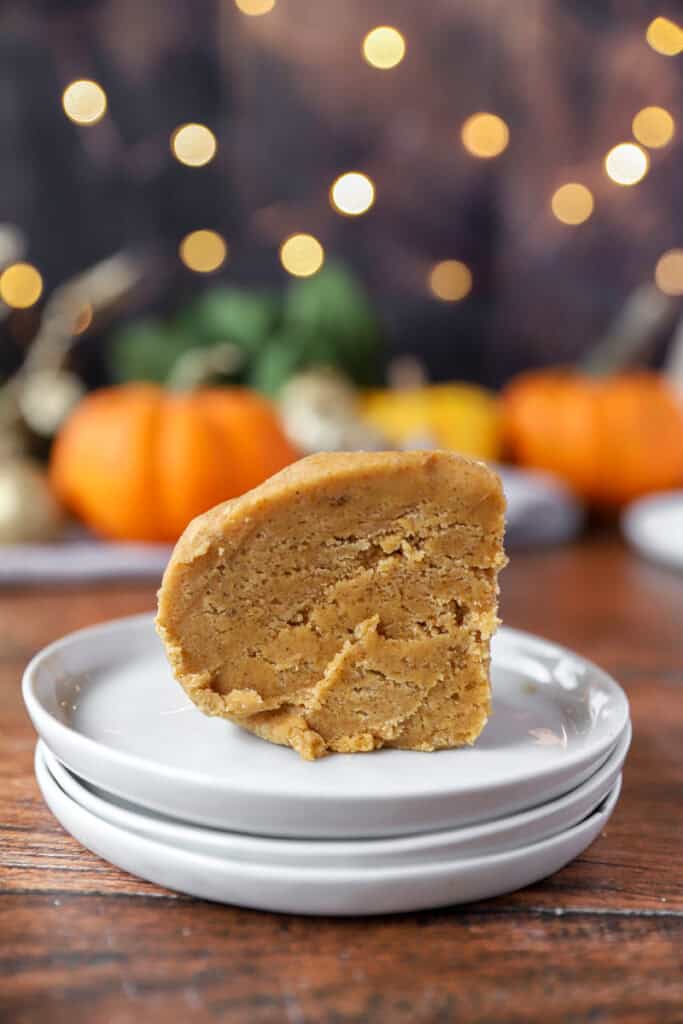
You’ll know your pumpkin is ready when you can mold it a bit in your hands and it retains its shape and isn’t too sticky.
Once you’ve properly dried your pumpkin the rest of the recipe is as easy as 1, 2, 3!
First. In one bowl combine all of the dry ingredients (except the white sugar!).
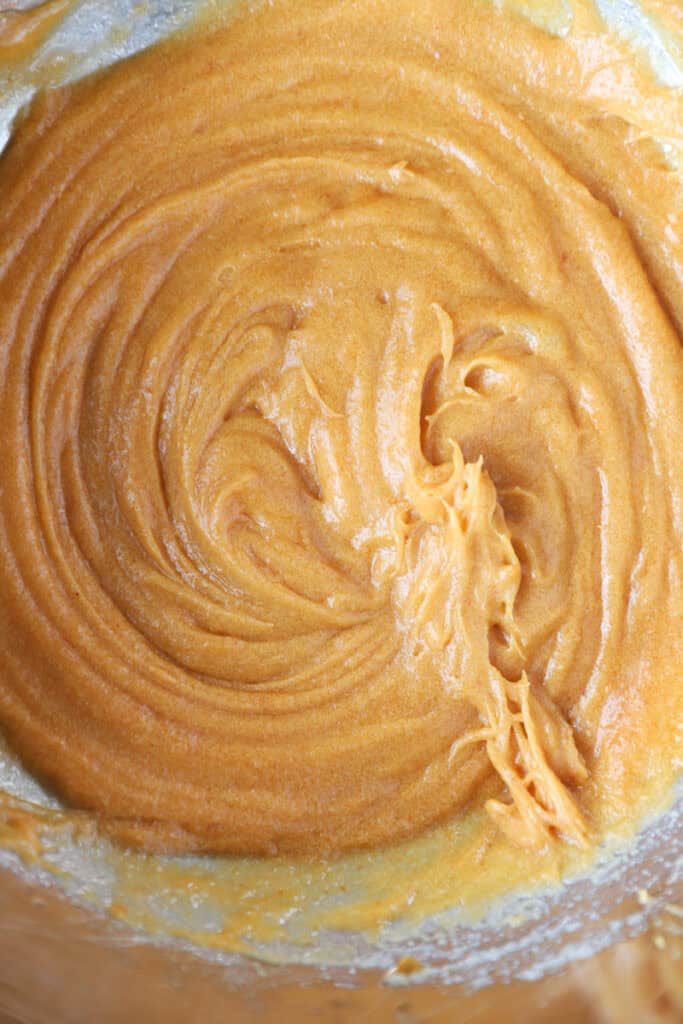
Second. In another bowl, whisk together the melted butter and the white sugar. Add the pumpkin and the rest of the wet ingredients.
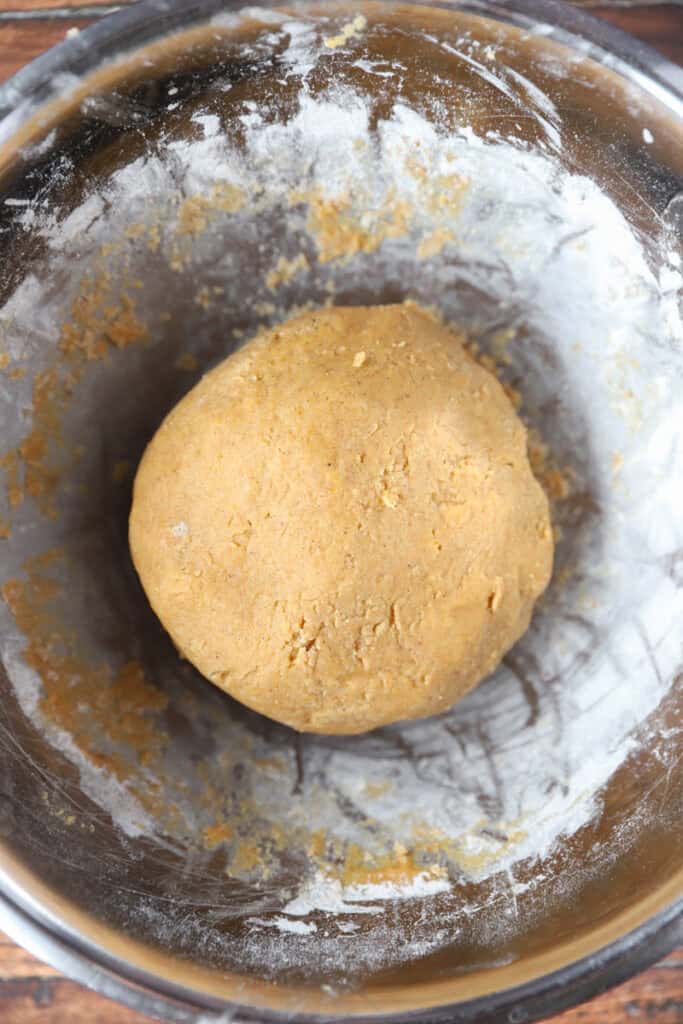
Next. Add the dry ingredients into the wet and stir. After it’s lightly combined you’ll need to use your hands to fully form the cookie dough and gently mold into a large mound. Then chill the dough for 1 hour!
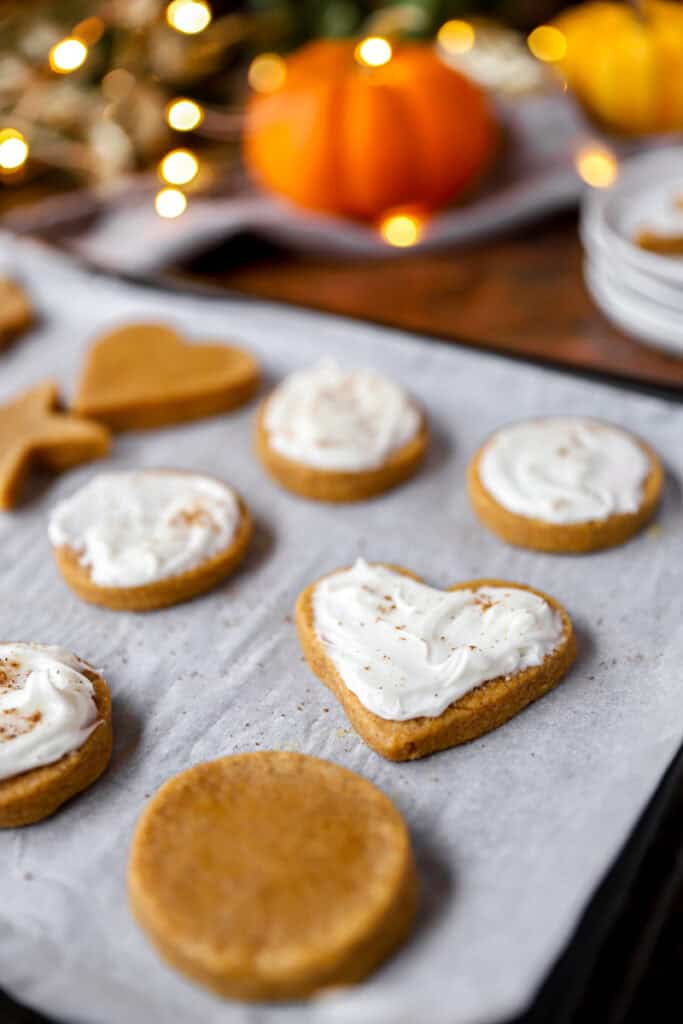
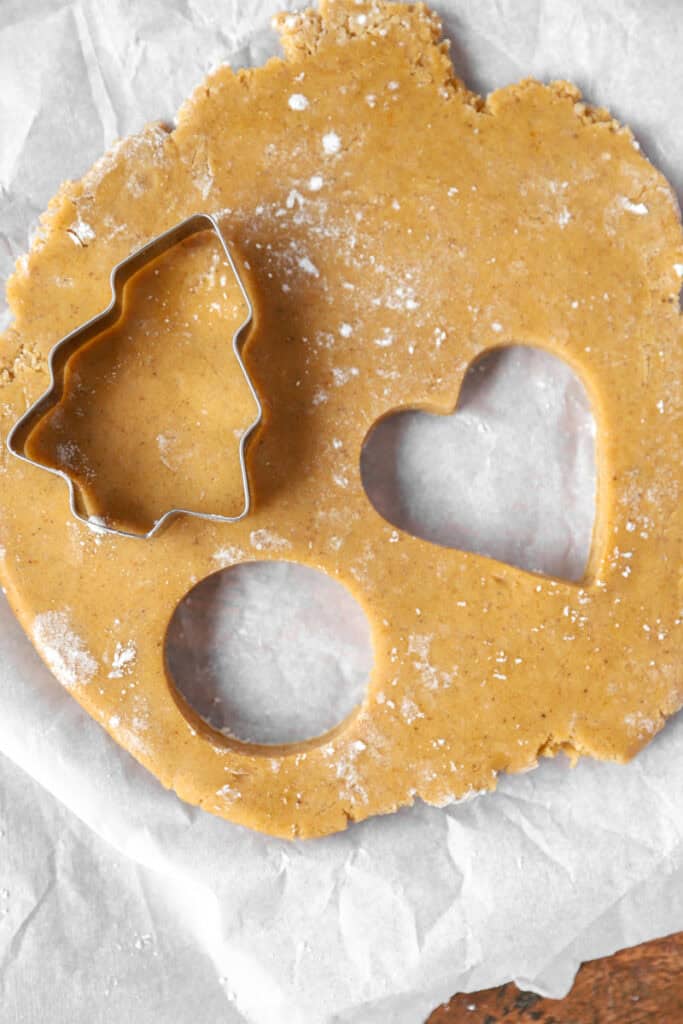
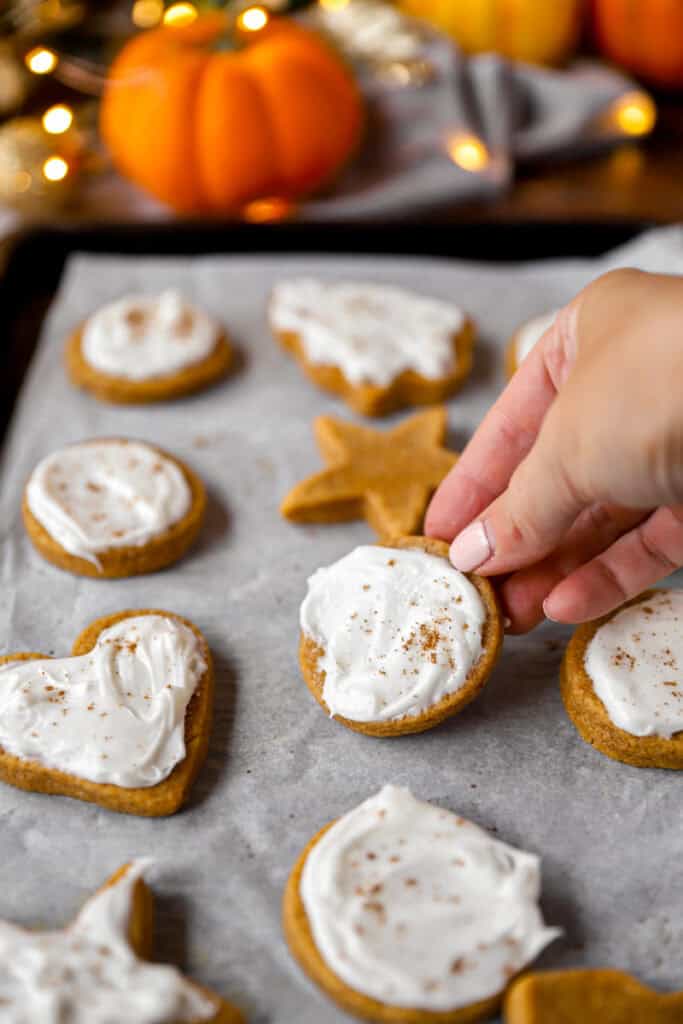
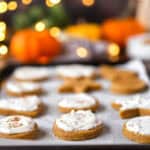
After the dough has chilled for the hour it will be perfect rolling consistency! This dough will hold even the most detailed shapes so have fun with it! I used a mix of hearts, circles, Christmas tree, snowflake, and angel.
Make sure to keep any dough that you’re not working with in the fridge, you don’t want it to warm up too much which will affect it’s ability to hold shape when baking.
You can add any fun sprinkles you want, but I chose to frost them.
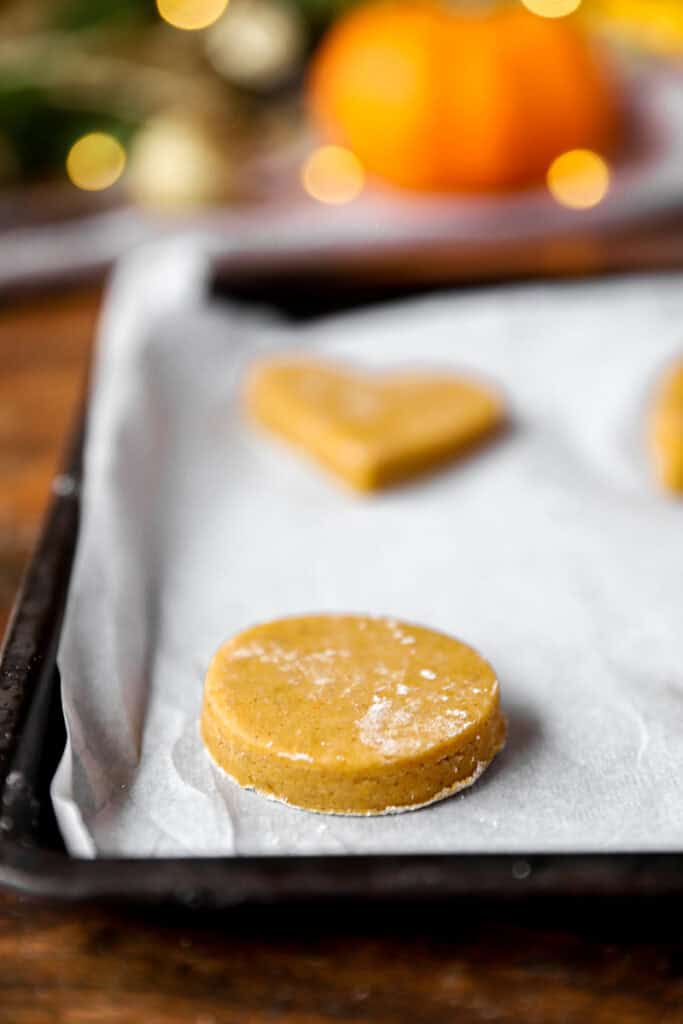
Once you’re shapes are ready bake them on parchment paper at 350 degrees for 10 minutes. Baking on parchment paper helps keep these nice and soft, no crunchy sugar cookies are allowed in my kitchen!
Allow them to cool completely before adding any frosting. I just used store bought white frosting then added a dusting of nutmeg. It’s really the perfect combination between sweet and pumpkin spiced.
COOKIE STORAGE
Just keep these cookies covered on the counter, no special storage needed! I’ll say these are best eaten within 4 days, after that I found that they can get a bit crunchy. Allow the frosting to firm up before stacking them, add a layer of parchment paper in between them.
For more pumpkin cookies perfect for the season, check out some of these blog favorites!
Pumpkin white chocolate chip cookies
Pumpkin dark chocolate cookies
Pumpkin spice latte cookies
Pumpkin Sugar Cookies
A soft and chewy pumpkin sugar cookie dough that you can roll and cut shapes from! Decorate with sprinkles or frosting and a dash of nutmeg topping.
- Prep Time: 75 minutes
- Cook Time: 10 minutes
- Total Time: 1 hour 25 minutes
- Yield: 22-24 cookies
- Category: Cookies
- Method: Bake
- Cuisine: American
Ingredients
2 and 1/4 cups all purpose flour
1 stick of salted butter, melted
1 cup white sugar
1 egg
1/2 cup canned pumpkin puree, dried (see post for photos)
1 tablespoon molasses
1 teaspoon vanilla extract
1 teaspoon baking powder
1 and 1/2 teaspoon cinnamon
1 teaspoon salt
1/2 teaspoon cloves
1 and 1/4 teaspoon ginger
1/4 teaspoon nutmeg
For topping
White or vanilla frosting
Nutmeg
Instructions
1. Start by drying the pumpkin puree. You can’t skip this step or the cookies will end up cakey and puffy. Use Libby’s brand only, store brands I found were way too wet. Add the pumpkin to a cheese cloth and squeeze continuously until most of the moisture is removed. The pumpkin should be the consistency of damp putty where you can handle it with your hands and it doesn’t stick. Use a few paper towels at the end to make sure there’s no lingering moisture. You can also continuously blot it with paper towels until most of the water has been removed. (If using a different brand pumpkin I found sometimes pieces of paper towel can stick to it, so cheesecloth method would be best if not using Libby’s). Once dried, set aside. See picture in post for the final consistency of my pumpkin
2. In a large bowl combine the flour, salt, baking powder, cinnamon, ginger, cloves, and nutmeg.
3. In another bowl, whisk together the melted butter and sugar. Then mix in the pumpkin, molasses, vanilla, and egg.
4. Add the dry ingredients into the wet, and stir and blend to combine. You will eventually need to use your clean hands to combine everything together and mold into the large ball of dough. (see photos in post).
5. Chill the dough for 1 hour.
6. When the dough is almost done chilling, preheat your oven to 350 degrees and line your baking sheet with parchment paper.
7. Working in batches, lightly flour your counter and roll out some of the dough then use your cookie cutters for whatever shapes you’d like. Add sprinkles if you’re using them!
8. Bake for 10 minutes.
9. Allow cookies to cool completely before frosting, then add a dash of nutmeg!
Notes
The pumpkin must be as dry as you can, it will still have some moisture but too much will result in cakey puffy cookies that won’t hold their cookie cutter shape.